Italian-Inspired Dinners
1/8/2022 | 24m 53sVideo has Closed Captions
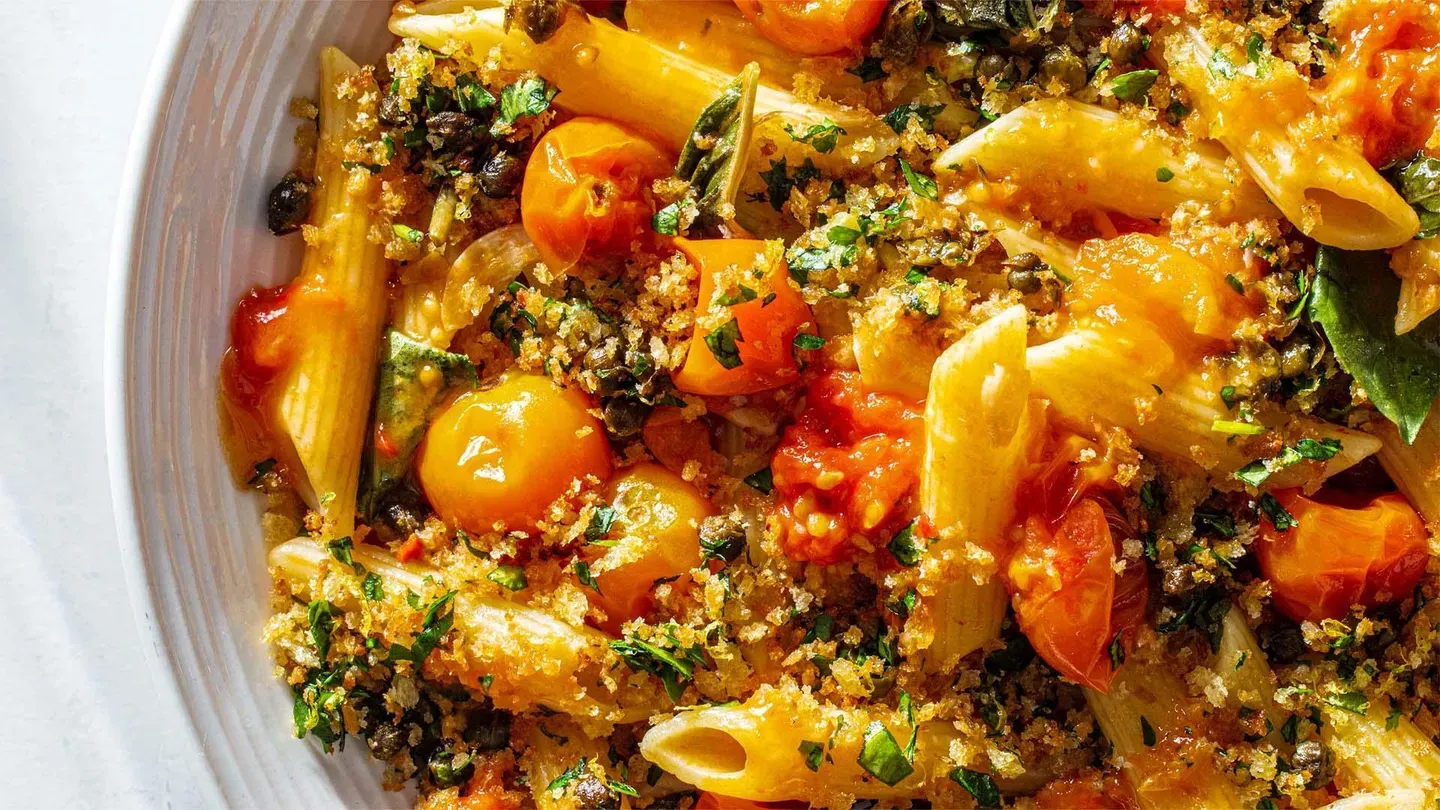
Braciole and Pasta with Burst Cherry Tomato Sauce and Fried Caper Crumbs.
Test Cook Dan Souza shows host Julia Collin Davison how to make the perfect Braciole. Testing expert Jack Bishop reviews angel hair pasta, and gadget critic Lisa McManus gives her top pick for scrubs brushes. Julia makes host Bridget Lancaster the perfect Pasta with Burst Cherry Tomato Sauce and Fried Caper Crumbs.
Problems with Closed Captions? Closed Captioning Feedback
Problems with Closed Captions? Closed Captioning Feedback
America's Test Kitchen is presented by your local public television station.
Distributed nationally by American Public Television
Italian-Inspired Dinners
1/8/2022 | 24m 53sVideo has Closed Captions
Test Cook Dan Souza shows host Julia Collin Davison how to make the perfect Braciole. Testing expert Jack Bishop reviews angel hair pasta, and gadget critic Lisa McManus gives her top pick for scrubs brushes. Julia makes host Bridget Lancaster the perfect Pasta with Burst Cherry Tomato Sauce and Fried Caper Crumbs.
Problems with Closed Captions? Closed Captioning Feedback
How to Watch America's Test Kitchen
America's Test Kitchen is available to stream on pbs.org and the free PBS App, available on iPhone, Apple TV, Android TV, Android smartphones, Amazon Fire TV, Amazon Fire Tablet, Roku, Samsung Smart TV, and Vizio.
Providing Support for PBS.org
Learn Moreabout PBS online sponsorship♪♪ ♪♪ ♪♪ ♪♪ -Today on "America's Test Kitchen," Dan makes Julia hearty braciole, Jack reveals our top pick for angel-hair pasta, Lisa reviews scrub brushes, and Julia shows Bridget a streamlined recipe for pasta with burst cherry tomato sauce.
It's all coming up right here on "America's Test Kitchen."
♪♪ -In much of Italy, the term "braciole" refers to meat that's pounded thin and rolled up with a filling.
The neat thing is that styles of braciole vary wildly from region to region.
Everything's up for grabs.
The meat can be beef, pork, or veal.
The fillings run the gamut from fresh herbs to hard-boiled eggs, and even the cooking method can be anything from braising or roasting to grilling.
So the question is what style are you making today, Dan?
-So, we're making the delicious style.
-[ Chuckles ] I like it.
-Yeah.
So we're gonna make really small little rolls, beautiful little packets.
Everyone gets an individual one.
It's gonna be braised in this gorgeous tomato sauce, but we're gonna pack it with a ton of really, really big flavor.
-Okay.
-So, we're gonna start here with our filling.
We've got 3 tablespoons of extra virgin olive oil, and to that, I'm gonna add five minced cloves of garlic.
We've got three anchovies that are minced.
Adds so much depth and savoriness.
We've got 2 teaspoons of grated lemon zest.
-You weren't kidding about added flavor -- garlic, anchovy, lemon zest, pow, pow, pow.
-Right off the top, exactly.
So, I'm just gonna stir this together, and then we're gonna add some herbs.
So, we have 1/3 cup of fresh chopped basil and 1/3 cup of chopped fresh parsley, and we have 1/3 cup of Pecorino Romano.
A lot of salt, a lot of good funk to it.
And then 1/3 cup of just plain bread crumbs.
-Okay.
-It's gonna help bind everything together.
-And these are just the store-bought bread crumbs.
These aren't homemade bread crumbs.
-Just store-bought.
They're great here.
So I'm gonna stir this together as well.
Beautiful.
And then I have 3 ounces of grated fontina cheese.
-A good melter.
-Good melter, exactly.
So we've got our flavor and funk from the Pecorino Romano, and then we've got good melting from the fontina.
And just stir this together.
-Off to a promising start.
-I know.
You want a spoon?
-I kind of do.
-Just want to dig right in here.
Awesome.
So I'll set this aside.
That is our beautiful filling.
So, next up, we get to the beef, and we are using a gorgeous flank steak for this.
You're looking for about 2 pounds.
A little over 2 pounds is fine.
And you don't often think of it as a braising cut, but it's got a fair amount of collagen in it that breaks down and gets nice and tender, and it's really, really beefy.
So it's actually beautiful for this.
So, the first step is to half this crosswise like this.
And then for each of these, I'm going to butterfly them so they're about half the thickness.
It's going to make our pounding out a lot easier.
We're starting with something thinner.
-Alright.
-So, what I like to do is bring it right to the edge of the board here, with the grain running like this and make that initial cut... right through, and then you kind of peel it back up, again, keeping your knife nice and parallel and dragging it through, and then I even actually like to hang it over the edge a little bit as I go.
-Oh, wow.
-Really allows you to stay parallel to it, as opposed to having to start angle as you go.
And then I just come in again.
-That is a really clever technique, Dan.
-Oh, I'm glad you like it.
So, I'm just gonna do the same thing with the second one.
So, we have nice, thin pieces of steak, but they're not thin enough for what we want.
So I'm gonna set three of them aside... work with one at a time and pound it out.
We're looking for about 1/4-inch thick on this, so I just cover it with plastic wrap.
-So, good and thin.
-Good and thin, exactly.
We're gonna roll it, and, you know, you really want it to be nice and thin and super tender.
Meat pounder -- I love this style here.
You can basically use it, you know, like you're pounding your fist on something, and then I'm just gonna pound it out.
So, that's great.
So I'm just going to repeat that with these other three.
-Okeydoke.
-So, we've got our nice pounded steaks here, and for each one of these, I'm gonna cut it in half, going with the grain.
-Because flank steak has a distinct grain that runs in one direction.
-That's right.
So we're gonna make eight total pieces.
So I'm gonna prep my station out for rolling these, and I'm gonna tie each one with two pieces of twine.
So, I'm gonna set that out ahead of time here.
So, you talked about that grain.
It is super important the direction you go in, and so that means we want the grain to be this way, parallel to the board.
Alright, great.
So I'm gonna add half the filling to these four here.
I'm just gonna spread it pretty evenly across it.
So the final layer before we roll these up is a beautiful, thin piece of prosciutto, so obviously, this is gonna add tons of saltiness, fattiness, funk.
It's just -- Yeah.
It's a beautiful thing.
-Mm-hmm.
Little bit of pork.
-Just a little bit of pork.
Awesome.
So now it's time to roll, so we're gonna start on this end and roll away from ourselves just like this.
-Alright, so nice and tight.
-Nice and tight.
-Alright.
-And then when you get to the end, we've already got our strings on there, so we can just go right around.
I like to do a little double.
-Double.
I think I tied mine tight enough.
You're tying them pretty tight.
Obviously, they'll shrink as they cook, and you don't want them to unroll, so... -I think you did a great job.
-[ Chuckles ] Thanks.
-And we'll go back and just trim off our ends so we have nice, neat little packages.
I'm just gonna transfer these over here and give myself room to do the other four.
-Okeydoke.
-So, I've got 1/4 cup of extra virgin olive oil heating over medium-high heat in this pot.
We're just getting it to shimmering, basically.
-Okay.
-And in the meantime, I'm gonna season up these rolls with a teaspoon of salt and 1/2 teaspoon of pepper.
-We didn't put any salt or pepper in the filling, but that's probably because that cheese is pretty salty.
-A lot of times, I can be pretty heavy-handed when I'm seasoning meat, and we want to be a little careful here.
Alright, so we're gonna get all of these into here.
It's gonna be nice and snug.
We're gonna brown them for about 8 to 10 minutes, flipping halfway through or as needed to get really good browning on all sides.
-They're all gonna fit in the pan?
-They're all gonna fit in the pan.
-Really?
Alright, this I've got to watch.
Well, I want to see how you organize them.
Oh, I see.
You're totally gonna fit them all in.
-Right?
-My goodness.
-Like a challenge.
So, we're gonna go for about 8 to 10 minutes.
We're looking for great browning on two sides.
Mmm-mmm.
-Smelling good.
-Smells great, right?
So, we've got beautiful browning.
Gonna get these out.
We're going right back onto the same tray we used.
They're gonna keep cooking later, so it's totally safe.
-Ooh, look at that fond in the bottom of the pot.
-That's so much flavor right there.
-Mm-hmm.
-Great.
Now we're gonna go in with one large chopped onion.
We're gonna cook this until it's nice and soft, about 5 to 7 minutes.
At the same time, I'm gonna move it around a lot and use it to scrape up some of that fond.
Okay.
Our onions are beautiful and softened.
They picked up a ton of that fond.
So we're gonna keep building some flavor.
We've got 1/4 teaspoon of crushed red pepper.
-Mm-hmm.
Little heat.
-And we've got 5 tablespoons of minced garlic.
-Some more garlic.
-A little more garlic, yep.
-So we're up to 11 cloves total so far?
-I think it's 10.
-[ Chuckles ] Not that I'm counting.
-I'm gonna cook this just until fragrant, which is happening already.
-Mmm.
Smells good.
-Takes about 30 seconds.
And then we'll go in with 1/4 cup of tomato paste.
About three or four minutes and get nice browning on it.
-Yeah, by browning tomato paste even for an extra minute or two, you really deepen the flavor of whatever sauce you're making.
-Time for a little bit of wine.
We've got 3/4 cup of red wine here.
-Mmm.
This is gonna be a deep-flavored sauce.
-Oh, yeah.
-I also love how you built up a really nice fond around the rim of the pan and now you can scrape it all off with the wine.
-Now we're gonna add a 28-ounce can of crushed tomatoes.
-Okay.
-And we've got 2 cups of beef broth.
Really reinforce that beef flavor.
Okay.
We're gonna get our rolls in there now.
Okay, so it's up to a simmer, which is awesome.
We're gonna cover this now.
And we're gonna braise in the oven, so I have a 325-degree oven, 2 1/2 to 3 hours.
We're looking for fork-tender.
We're gonna flip them halfway through.
-Okay.
Oh, the aroma coming from this oven is unmistakable.
-So good.
-[ Chuckles ] Oh, goodness.
-Beautiful.
Alright, so you need to be really careful -- these are fork-tender -- when you're taking them out and transferring them.
-Oh, I can see in your tongs, they're just squeezable.
-Right?
Just beautiful and tender.
Okay, so now I'm just gonna take this twine off.
So, I've got all those strings off.
-Mm-hmm.
-Finish up our sauce.
So, we've got another 2 tablespoons of chopped fresh basil.
-Ah, freshen up that sauce a little bit.
-Exactly.
So, I'm gonna stir that in.
And then we'll do a little taste for seasoning.
Mm.
Doesn't need any more salt.
And just do a little bit of pepper in there.
And I will ladle our sauce over the top.
Oh, beautiful.
Can I serve you one?
-Please.
-Or two, maybe?
-How about two?
Thank you.
-Great, and there's a little bit of extra Pecorino Romano, if you'd like to finish with that.
-Ah!
-Alright, let's dig in.
-I can't wait to dive into this.
Doesn't even need a knife.
-I know, right?
It's so tender.
-Mmm!
Oh!
-Mmm.
-You get the beef, the cheese.
Ah, a little bit of lemon, the garlic.
Oh, man!
That is a hearty, hearty dish.
-It's so good.
-It's so good.
-And that flank steak is the perfect cut for this.
-Mm-hmm.
-It's super beefy.
It's got enough fat to stand up to that long cook.
It's really nice.
-Oh, Dan, this is delicious.
Thank you.
-You're welcome.
-So, if you want to make this classic beef braciole, make a filling with herbs, cheese, and bread crumbs.
Using flank steak, carefully cut, pound, and roll the meat into portions, and braise until very tender in a simple tomato sauce.
From "America's Test Kitchen," a classic recipe for braciole.
This is a winner.
♪♪ -Can I ask you -- What did angel hair pasta ever do to inspire such vitriol and animosity in the food media?
And if you think I'm making this up, I'm gonna read you some recent stories that have been in the media.
First one, "You couldn't pay me to eat angel hair pasta."
Or, "LeBron James hates angel hair spaghetti, and he's not wrong."
Okay, let's have a talk about angel hair and why you should be giving it a chance.
First of all, nothing twirls like angel hair.
Because it's so thin, it goes around the tines beautifully.
And if you're somebody who struggles, maybe a child, you should be thinking about angel hair pasta.
It will be on your fork rather than on your shirt.
Second of all, if you're somebody who loves sauce, it absorbs and holds on to sauce beautifully, and you get a higher sauce-to-pasta ratio.
That said, I don't want you buying these cute little nests.
Yes, the nests are beautiful, but they're also short.
They break apart in the pot.
You want to buy a long-strand angel hair.
Now, if you're thinking, "What's the right size?"
-- 'cause there is such a thing as angel hair that is too thin.
I've got spaghetti here.
This is 2.3 millimeters.
This is the thinnest of the angel hair.
This is just 1.1 millimeter.
It was really difficult to cook.
Even when we reserved pasta cooking water, it was sticking together.
You want to get our winner.
Our winner is from Barilla.
It is 1.4 millimeters across.
That is the right size for angel hair.
So, if you're somebody who has trouble twirling, or maybe you're somebody who just loves sauce, or maybe you're an iconoclast who wants to ignore what the food media is telling you, except for this food media, go ahead -- give angel hair a chance.
♪♪ -When we're tackling the most stubborn cookware messes, we grab a scrub brush.
Brushes are way better than sponges at cutting through tough, gunky messes on pots and pans.
Their handles give us good leverage for scrubbing power, and they keep our hands out of hot water.
But not all scrub brushes are created equal.
We tested nine, priced from about $5 to about $24.
We put them through the wringer, making messes and cleaning up, scrubbing pans, skillets, and mixing bowls.
And we washed those brushes at least 10 times.
And then we sent them home with test cooks for weeks of real-world use.
The bad news -- Plenty of these, they squished flat and they couldn't cut through stuck-on food.
They felt uncomfortable.
Or they cleaned a pan, but then they were permanently gunked up.
Forget these.
One brush ruled them all.
This is the O-Cedar Rinse Fresh Pot & Pan Brush at about $18, and it easily washed away the competition.
And here's why.
These stiff plastic bristles cut through every mess.
The way they flare out around the brush, they help you get into tight corners.
And wide gaps between the bristle clusters let food wash away.
The handle's gentle curve and silicone grip feel really comfortable and secure, even in slippery, soapy water.
And bonus -- This little row of ultra stiff bristles on the back.
They get right in any tight spot.
Now, I used this brush when I was testing cast-iron grill pans, and it was the only tool that really worked.
And then when the brush finally got dirty from cleaning up after 40 greasy burgers, I threw it right in the dishwasher, and boom -- good as new.
This brush has earned a permanent place by my sink, and I think it belongs in your kitchen, too.
♪♪ -It's always a good idea for the home cook to have a few pasta recipes that they can pull out of their back pocket at the last minute.
Julia's here, and she's gonna show us a quick recipe that features cherry tomatoes.
-Mm-hmm.
-I'm intrigued.
-[ Laughs ] Well, cherry tomatoes are brilliant 'cause they're available year-round, and they just pack more flavor than those big old beefsteaks.
-Mm-hmm.
-They have more sugar, they have more of those savory glutamates, and they have more soluble pectin, which means you don't have to reduce it for a while in order for that sauce to coat the pasta.
-I feel like in January, too, they're a lot better than the tomatoes from the supermarket.
-Yep, and everything else is pantry-friendly.
-Fabulous.
-So, to get started, actually, this sauce is so darn fast, we're gonna put the pasta water on to boil before we start making the sauce.
-Alright.
-That's how easy this recipe is.
So, this is 4 quarts of water, nice, big pot.
Put the lid on.
Now the clock's ticking.
-This is the timer.
-[ Laughs ] It certainly is.
Now, I'm not only confident that this sauce is gonna be done in time, I'm gonna make a topping.
-What?!
-Now, this topping's totally optional, but I know you're gonna love it.
So, I have 2 tablespoons of extra virgin olive oil in this 10-inch nonstick skillet, medium heat.
Just looking for it to shimmer.
-Okay.
-In the meantime, I'm gonna prep some anchovies.
-Mm-hmm.
-Mm-hmm!
So, some of these are for the sauce, some are for the topping.
I'm gonna chop them all right now.
I rinsed these off and patted them dry.
You really want them to melt into the sauce and melt into the topping.
They just add a lovely background note.
-Just a savory umami bomb.
-That's it.
Umami bomb.
Say that 10 times fast.
-Umami bomb, umami bomb... -[ Laughing ] -...umami bomb, umami bomb, umami bomb, umami bomb.
-That's pretty good.
Alright.
Gonna add this one anchovy, and I'm gonna add some capers.
-Okay.
-This is 1/4 cup of capers that I rinsed and patted dry.
-And I'm stepping back.
-Yeah.
So, medium heat.
So, we're just gonna cook this for a few minutes, about three minutes.
We're looking for those capers to shrink and darken in color.
-Alright.
-Ho-ho, those are perfect.
-Ahh!
-Now I'm just gonna take the capers and anchovies out with a slotted spoon just so I can leave that oil in the pan.
Oh, you got that look on your face.
-I just want a big loaf of bread, a schmear of butter, and then those right on top.
-Fried capers and anchovies.
-Yeah.
-I know.
There we have it.
The solids are out.
Now, back to the oil left in the pan, I'm gonna add some panko.
This is 1/2 cup of panko.
1/8 teaspoon salt, 1/8 teaspoon pepper.
Now we're gonna toast the panko in that flavorful oil for another four or five minutes till they're nice and golden.
Again, over medium heat.
-Mmm!
Now, you did create such a beautiful flavored oil.
Don't waste it.
-That's right.
Alright.
Ho-ho!
-Beautiful.
-Aren't they?
That only took about four minutes.
-And it smells great, too.
-Yeah.
Right back into the bowl.
Now I'm gonna mix in the fried capers and anchovies, 1/4 cup of fresh parsley, and this is a teaspoon of fresh lemon zest.
Now, again, this is optional.
If you didn't want to make this or these aren't your flavors, you could just substitute Parmesan on top of the pasta.
That tastes delicious, too.
Once you've had this, and if this is your thing, you'll never not want to make it.
-I just want to point out that you haven't even made the sauce yet.
-Yeah, I know!
-And I would be fine with that on pasta.
-[ Laughing ] Alright, that's it for the topping.
Now onto the sauce.
I'm gonna start with a little bit of garlic.
Just two cloves.
We're gonna slice them thin.
So, I'm just gonna take off that root end there.
Alright.
So, there we have some nice, thinly sliced garlic.
Gonna put it in this little pot, and this pot has 4 tablespoons of extra virgin olive oil.
It's not on yet.
Now we're gonna add the reserved anchovies.
That's about two anchovies.
Alright.
Over medium heat this goes.
Just gonna cook it for four or five minutes until the anchovies start to disappear and the garlic gets a little golden.
-Mmm, and you couldn't do this with minced garlic.
It would be done well before -- what'd you say, four to five minutes?
-That's it.
-But with sliced garlic, you can cook it for a longer period of time without having to worry about it scorching.
-Yeah, and all those flavors get infused into the oil.
-Mm-hmm.
-So this is time well spent.
-Alright.
-[ Inhales ] Mmm!
Flavorful oil, once again.
Oh, just dip some bread in that.
-Yes, please.
-Hello.
So, it's been a few minutes.
You can see the edges of garlic are starting to get golden.
Now it's time to add the tomatoes.
2 pounds of cherry tomatoes.
-Okay.
-No prep.
-No prep?
-No prep.
In the pot they go, whole.
Isn't that something?
-That is really easy.
-It is super easy.
-Yeah.
-All you have to do is wash them.
And that's why I love this recipe -- it's great for beginners.
I taught my 12-year-old to make it because I think if you're gonna have one sauce in your back pocket that you don't need a recipe for, this is it.
-Lovely.
-So, 2 pounds of tomatoes.
Gonna add a little bit of salt.
This is 1 1/2 teaspoons of salt.
1/4 teaspoon sugar -- just a little bit.
And this is red pepper flakes.
I like it a little on the spicy side.
-Me too.
-So, that's a 1/4 teaspoon pepper flakes.
You can adjust that as you want to.
Alright, I'm just gonna shake these tomatoes around.
Alright, so you just want to get those tomatoes coated with all that flavor.
-Mm!
-Now we're gonna put the lid on, crank the heat to medium-high, and just let it go for 10 minutes, hands off.
So, the tomatoes on the bottom will cook and turn saucy.
The tomatoes on the top will soften, but stay whole.
So, let's take a look at this pasta water.
Ha-ha!
-Boiling.
-She's boiling, which is good.
Again, this is 4 quarts of water, classic pasta cooking method.
A tablespoon of salt.
-Hey!
-Yeah!
I love that part.
Now we're gonna add 12 ounces of pasta, and we're just gonna cook it until it's al dente, which, depending on different pasta shapes, can take different amounts of time.
-You got a little campanelle going on there.
-Mm-hmm, I like how that shape, those little tulips really curve around the sauce.
-Yeah.
Alright, it's been 10 minutes.
Time to take a peek.
Ho-ho!
-Oh, yeah.
-Oh, that smells good.
You can see the bubbling around the edges of the pot.
That's the tomatoes on the bottom that have released their juice.
And the tomatoes on top, you can see they're softened.
Their skins have just started to split, but they're still whole.
-A little withered.
-Mm-hmm.
-Mm.
-Alright.
So, I'm gonna cover this.
Put this off the heat.
Time to check the pasta.
-Okay.
-And if my timing is correct, this pasta will be perfect.
Only one way to tell if pasta is fully cooked, and that's to taste it.
-Yes.
I thought you were gonna throw it at me there for a second.
-[ Laughs ] Not today, my friend.
-Alright.
-Cool it off a little bit.
Mmm!
On the nose.
-What are you looking for?
-A little bit of bite in the very center, but tender on the edges.
-Okay.
Alright.
-So, if you wouldn't mind draining it, but also saving some of the cooking liquid water over there.
-Yep, you got it.
-On that side.
Meanwhile, I'm just gonna tear some basil leaves.
-Sounds good.
About 1/2 cup?
-Yeah.
-That sound good?
-Yeah.
We may not use it.
It's just to loosen up the sauce -- -Yeah.
-...if we need to.
So, we're gonna finish this pasta with some fresh basil, and rather than cut it, I'm just gonna tear it into some nice big pieces, nice rustic pieces.
This is a very rustic dish.
That's about 1/2 cup of basil.
Alright.
Back into the pot we go.
-Alright.
-Alright, now, gonna gently transfer this tomato mixture right into the pasta.
-Mmm.
-Ho-ho, yes.
Want to get all the little bits on the bottom of the pan in that pot.
Ho-ho!
Hello, garlic.
-It's a lot of flavor.
You don't want to leave anything behind.
-Nope.
So, now we're gonna add 2 tablespoons of chilled unsalted butter.
This just adds some richness, adds some nice body.
And, of course, the basil.
Stirring it so that some of those tomatoes break down, some stay whole, that butter melts.
-Mmm.
-A nice creaminess -- -Mm-hmm.
-...so that cherry tomato, the flavor, all of it sticks to the pasta.
-That's it.
Alright.
Oh, it smells amazing.
-Ah!
-Just gonna add a little of that pasta cooking water, help some of that butter and those tomato juices make a nice, luscious sauce.
Time to taste.
Give you some nice, big tomatoes on top.
Oh, hello.
So, here's a little of that topping that we made at the very beginning.
-Mm!
This is restaurant-worthy.
-It is.
I mean, that's what it's all about.
You're getting a nice, warm -- -Mmm!
-...cooked-through, juicy cherry tomato.
Mm-hmm.
-And even though it's not a smooth tomato sauce, you just have the cherry tomatoes going in there, but they burst and they created this juicy, juicy sauce.
-Yeah.
I mean, it's so easy.
I love that you don't have to prep the cherry tomatoes.
You just dump them in the pot and they cook perfectly on their own.
-Mmm!
-So easy.
-So savory, too.
-Mm-hmm.
-Really well seasoned.
Every bite, it's kind of packing a punch.
-Yeah.
Crunch is good.
-Yes.
-But I love those crispy capers and the toasted bread crumbs.
-I think this is perfection.
-Ah, thank you.
-Right out of the pantry.
And if you want to make this perfect sauce at home, start with a crunchy bread crumb coating.
Sauté anchovies with capers and then toss with bread crumbs.
Cook cherry tomatoes with garlic and anchovies until the tomatoes start to break down.
Toss pasta with the sauce and butter, then finish with torn basil.
So, from "America's Test Kitchen," a tasty and quick pasta with burst cherry tomato sauce.
You can get this recipe and all the recipes from this season, along with product reviews and select episodes, on our website.
That's americastestkitchen.com/tv.
Mmm.
-A little more.
-You're going back for seconds.
-Oh, here.
I'll hook you up.
-Mm.
Good to have a crumb connection.
-[ Laughs ] ♪♪ ♪♪


Support for PBS provided by:
America's Test Kitchen is presented by your local public television station.
Distributed nationally by American Public Television